NERDIO GUIDE

Beyond a conference — NerdioCon 2026: Learning, networking & unforgettable moments.
Save your spot
NERDIO GUIDE
Amol Dalvi | July 28, 2025
Automating the right-sizing of your Azure Virtual Desktop (AVD) images is the process of using real-world performance data to ensure your session host virtual machines (VMs) are provisioned with the optimal amount of resources. By creating automated workflows, you can eliminate wasteful spending on oversized VMs and prevent the poor user experience caused by undersized ones.
This data-driven approach ensures your AVD environment operates at peak efficiency, balancing cost and performance without constant manual intervention.
Understanding the core concepts behind right-sizing is the first step toward building a more efficient and cost-effective AVD environment. This process is about making informed, data-driven decisions rather than relying on guesswork or initial estimates.
In AVD, right-sizing is the practice of matching a session host VM's resources—specifically its CPU, RAM, and disk type—to the actual demands of the user workloads it supports. It involves analyzing performance over time to find the "goldilocks" size for your images. This avoids two common and costly problems:
Basing your sizing decisions on actual performance data is the only way to know for sure what your users require. Initial deployments are often based on vendor recommendations or assumptions that don't reflect the unique way your users interact with their applications. Properly estimating the total cost of ownership (TCO) for an AVD deployment from the outset can help avoid these pitfalls by providing a more realistic financial forecast.By collecting and analyzing metrics directly from your session hosts, you replace assumptions with facts, enabling precise adjustments that directly correlate to real-world usage patterns. This data-driven approach is also fundamental to budgeting for unpredictable user demand in an AVD consumption-based model, as it provides the insight needed to forecast costs more accurately.
When you consistently right-size your AVD images, you unlock significant advantages for your organization. The benefits go beyond just saving money and create a more stable and efficient digital workspace.
To right-size effectively, you need to collect the right data. Focusing on a few key performance indicators (KPIs) will give you a clear picture of user demand and session host health without drowning you in unnecessary information.

CPU pressure is a common cause of poor VDI performance. Tracking these metrics will tell you if your session hosts are keeping up with processing demands.
Insufficient memory forces the operating system to rely on the much slower disk page file, drastically degrading performance. These metrics help you track memory pressure.
While CPU and memory are primary, disk and network performance are also crucial for application responsiveness and the overall user experience.
Azure provides robust, built-in tools for collecting and storing this information. You can gather all the necessary metrics from these primary sources:
This step-by-step wizard tool gives you the total cost of ownership for AVD in your organization.
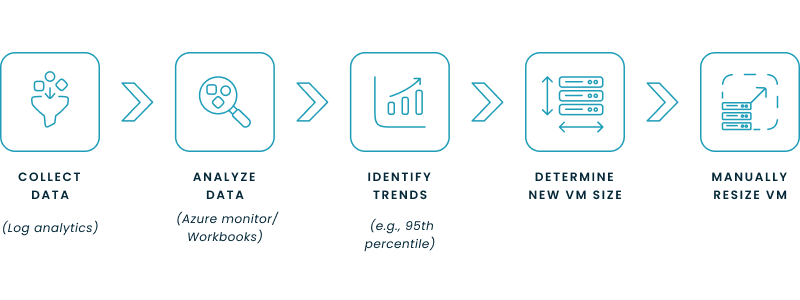
Before you can automate, it's essential to understand the logic behind the process. Manually analyzing your performance data helps you learn your environment's unique patterns and forms the basis for any automated workflow you build later.

A baseline is a snapshot of your environment's performance over a representative period. It's the standard against which you'll measure future performance.
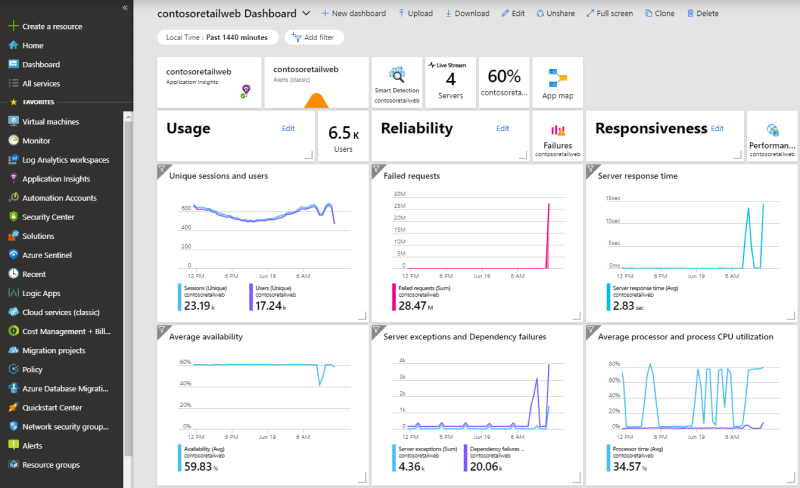
Once you have data in Log Analytics, you can use Azure's tools to query and visualize it. The goal is to find the sweet spot that covers peak demand without significant over-provisioning.
With your analysis complete, the final step is to select a new VM instance type or size.
While manual analysis is insightful, true operational efficiency comes from automation. There are several methods for automating the right-sizing process in Azure, ranging from custom scripts to comprehensive third-party platforms.
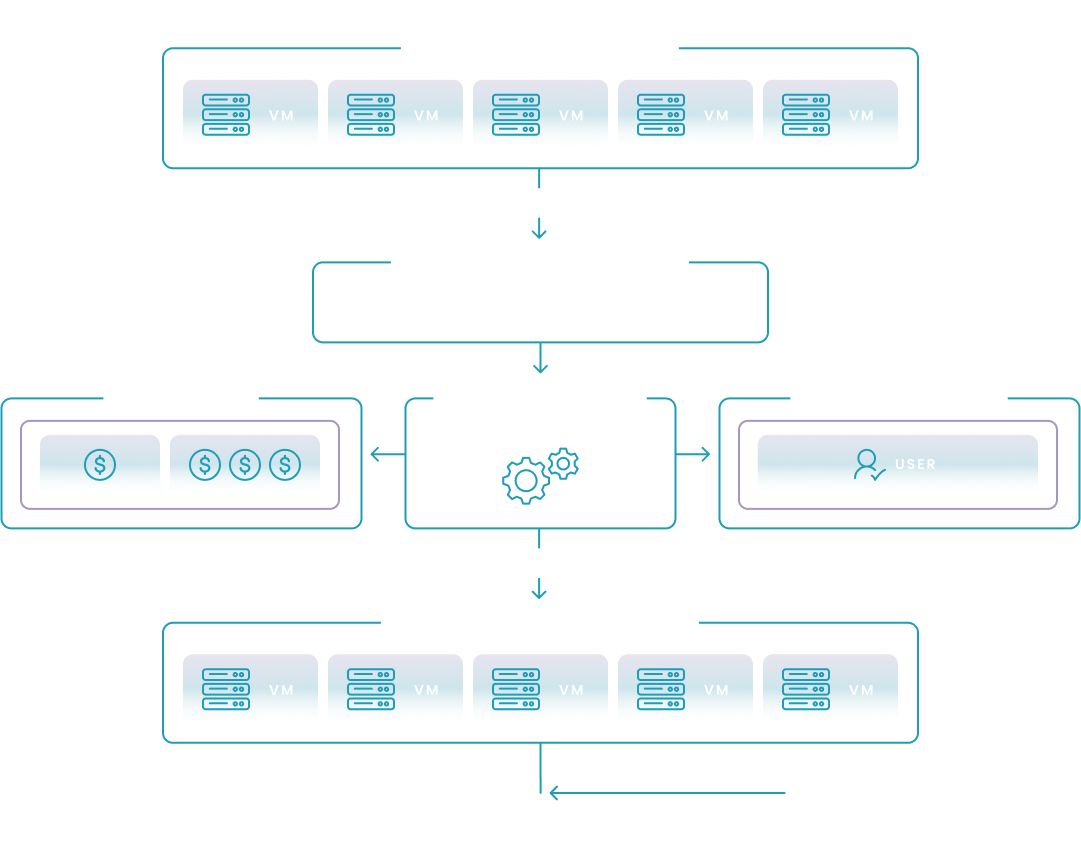
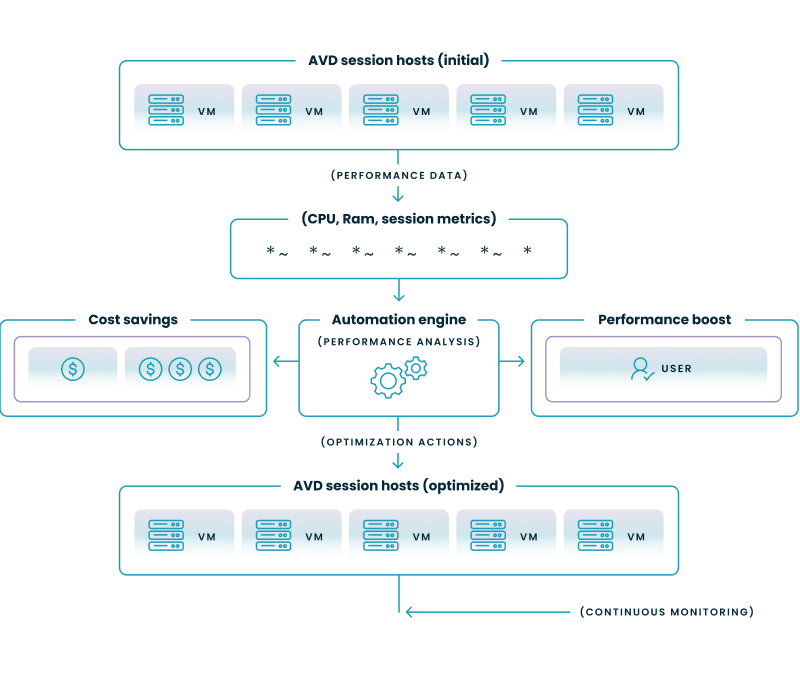
The diagram below illustrates the ideal, continuous loop for automated AVD right-sizing. This process uses live performance data to drive an automation engine, which constantly adjusts resources to balance cost savings with user performance. The following sections explore the different methods—from custom scripts to dedicated platforms—that you can use to build and implement this powerful optimization cycle.

This table provides a high-level comparison of the different approaches you can take to automate AVD right-sizing.
Automation Method Comparison
| Method | Primary Tool(s) | Complexity | Best For | Key Consideration |
|---|---|---|---|---|
| Custom PowerShell Scripts | PowerShell, Azure Modules (Az.Compute, Az.OperationalInsights) | High | Organizations that require highly customized, granular control and have deep in-house scripting expertise. | Requires significant development, testing, and ongoing maintenance. There is no native user interface for management. |
| Azure Automation | Azure Automation Runbooks | High | Teams that have already developed PowerShell scripts and need a native Azure service to schedule and run them automatically. | This is primarily a scheduler and host for your scripts; the complex scaling and analysis logic must still be built and maintained from scratch. |
| Azure Logic Apps | Logic Apps Designer | Medium | IT teams that prefer a low-code, visual workflow designer for creating event-driven automation and integrating with other services (e.g., Teams, Outlook). | Workflows for complex scaling logic can become difficult to manage, and cost can increase with high-frequency operations. |
| Nerdio Platform | Nerdio Manager for Enterprise | Low | Enterprises seeking a turnkey, easy-to-manage solution with a rich feature set specifically designed for AVD cost and performance optimization. | This is a comprehensive commercial platform that abstracts away the underlying complexity, providing a UI-driven, auditable, and fully supported solution. |
To help you decide which path is right for your organization, the following sections explore each of these methods in greater detail.
For teams with strong scripting skills, using PowerShell provides granular control over the automation logic.
Azure Automation takes your custom PowerShell scripts and turns them into a manageable, schedulable service.
Azure Logic Apps provide a more visual, workflow-based approach to automation, which can be easier to manage than pure code.
For enterprises seeking a robust, feature-rich solution without the complexity of building and maintaining a custom system, a dedicated platform is the most efficient method.
See this demo to learn how you can optimize processes, improve security, increase reliability, and save up to 70% on Microsoft Azure costs.
Regardless of the tool you choose, certain best practices are universal for ensuring your automation is safe and effective.
See how you can optimize processes, improve security, increase reliability, and save up to 70% on Microsoft Azure costs.
Right-sizing is the process of matching a cloud resource's size and performance to its actual workload requirements to optimize for cost and efficiency. This involves analyzing usage data to avoid over-provisioning, where you pay for capacity you don't need, and under-provisioning, which can cause poor performance. The goal is to pay only for the resources a workload truly consumes.
You can right-size Azure Virtual Machines using native tools by analyzing their performance metrics in Azure Monitor and acting on recommendations from Azure Advisor. Azure Advisor's "Cost" recommendations will identify underutilized VMs and suggest more appropriate, cost-effective sizes. After identifying a target size, you can then manually resize the VM in the Azure portal or automate the change with PowerShell scripts.
To find unattached disks in the Azure portal, search for and select the "Disks" service, then sort the list by the "Attached to" column; any disk without a value in this column is unattached. Alternatively, you can use Azure PowerShell or CLI scripts to programmatically identify disks where the ManagedBy property is null. Deleting orphaned disks and de-provisioning unused virtual desktops are direct ways to reduce unnecessary storage costs.
The right virtual machine size depends entirely on your workload's specific CPU, memory, storage, and networking needs. To determine the correct size, you should first analyze the performance baseline of your application, then select an Azure VM series optimized for that type of work (e.g., D-series for general purpose, E-series for memory-intensive). It is critical to monitor utilization after deployment and adjust the size as needed to ensure a balance of performance and cost.
Yes, it is possible to automatically trigger the resize of an Azure VM based on specific conditions. This can be achieved by setting up an alert in Azure Monitor for a certain metric, like average CPU percentage over time. This alert can then trigger an action, such as an Azure Automation runbook or a Logic App, which executes a script to resize the virtual machine to a predefined larger or smaller size.


Software product executive and Head of Product at Nerdio, with 15+ years leading engineering teams and 9+ years growing a successful software startup to 20+ employees. A 3x startup founder and angel investor, with deep expertise in Microsoft full stack development, cloud, and SaaS. Patent holder, Certified Scrum Master, and agile product leader.